This listing is for a blemished version of the 36" x 24" Dragon Wagon table top.
Buy 2, Get An Extra $100 OFF


Lead Time
Please allow a 4 week lead time for any new orders placed.
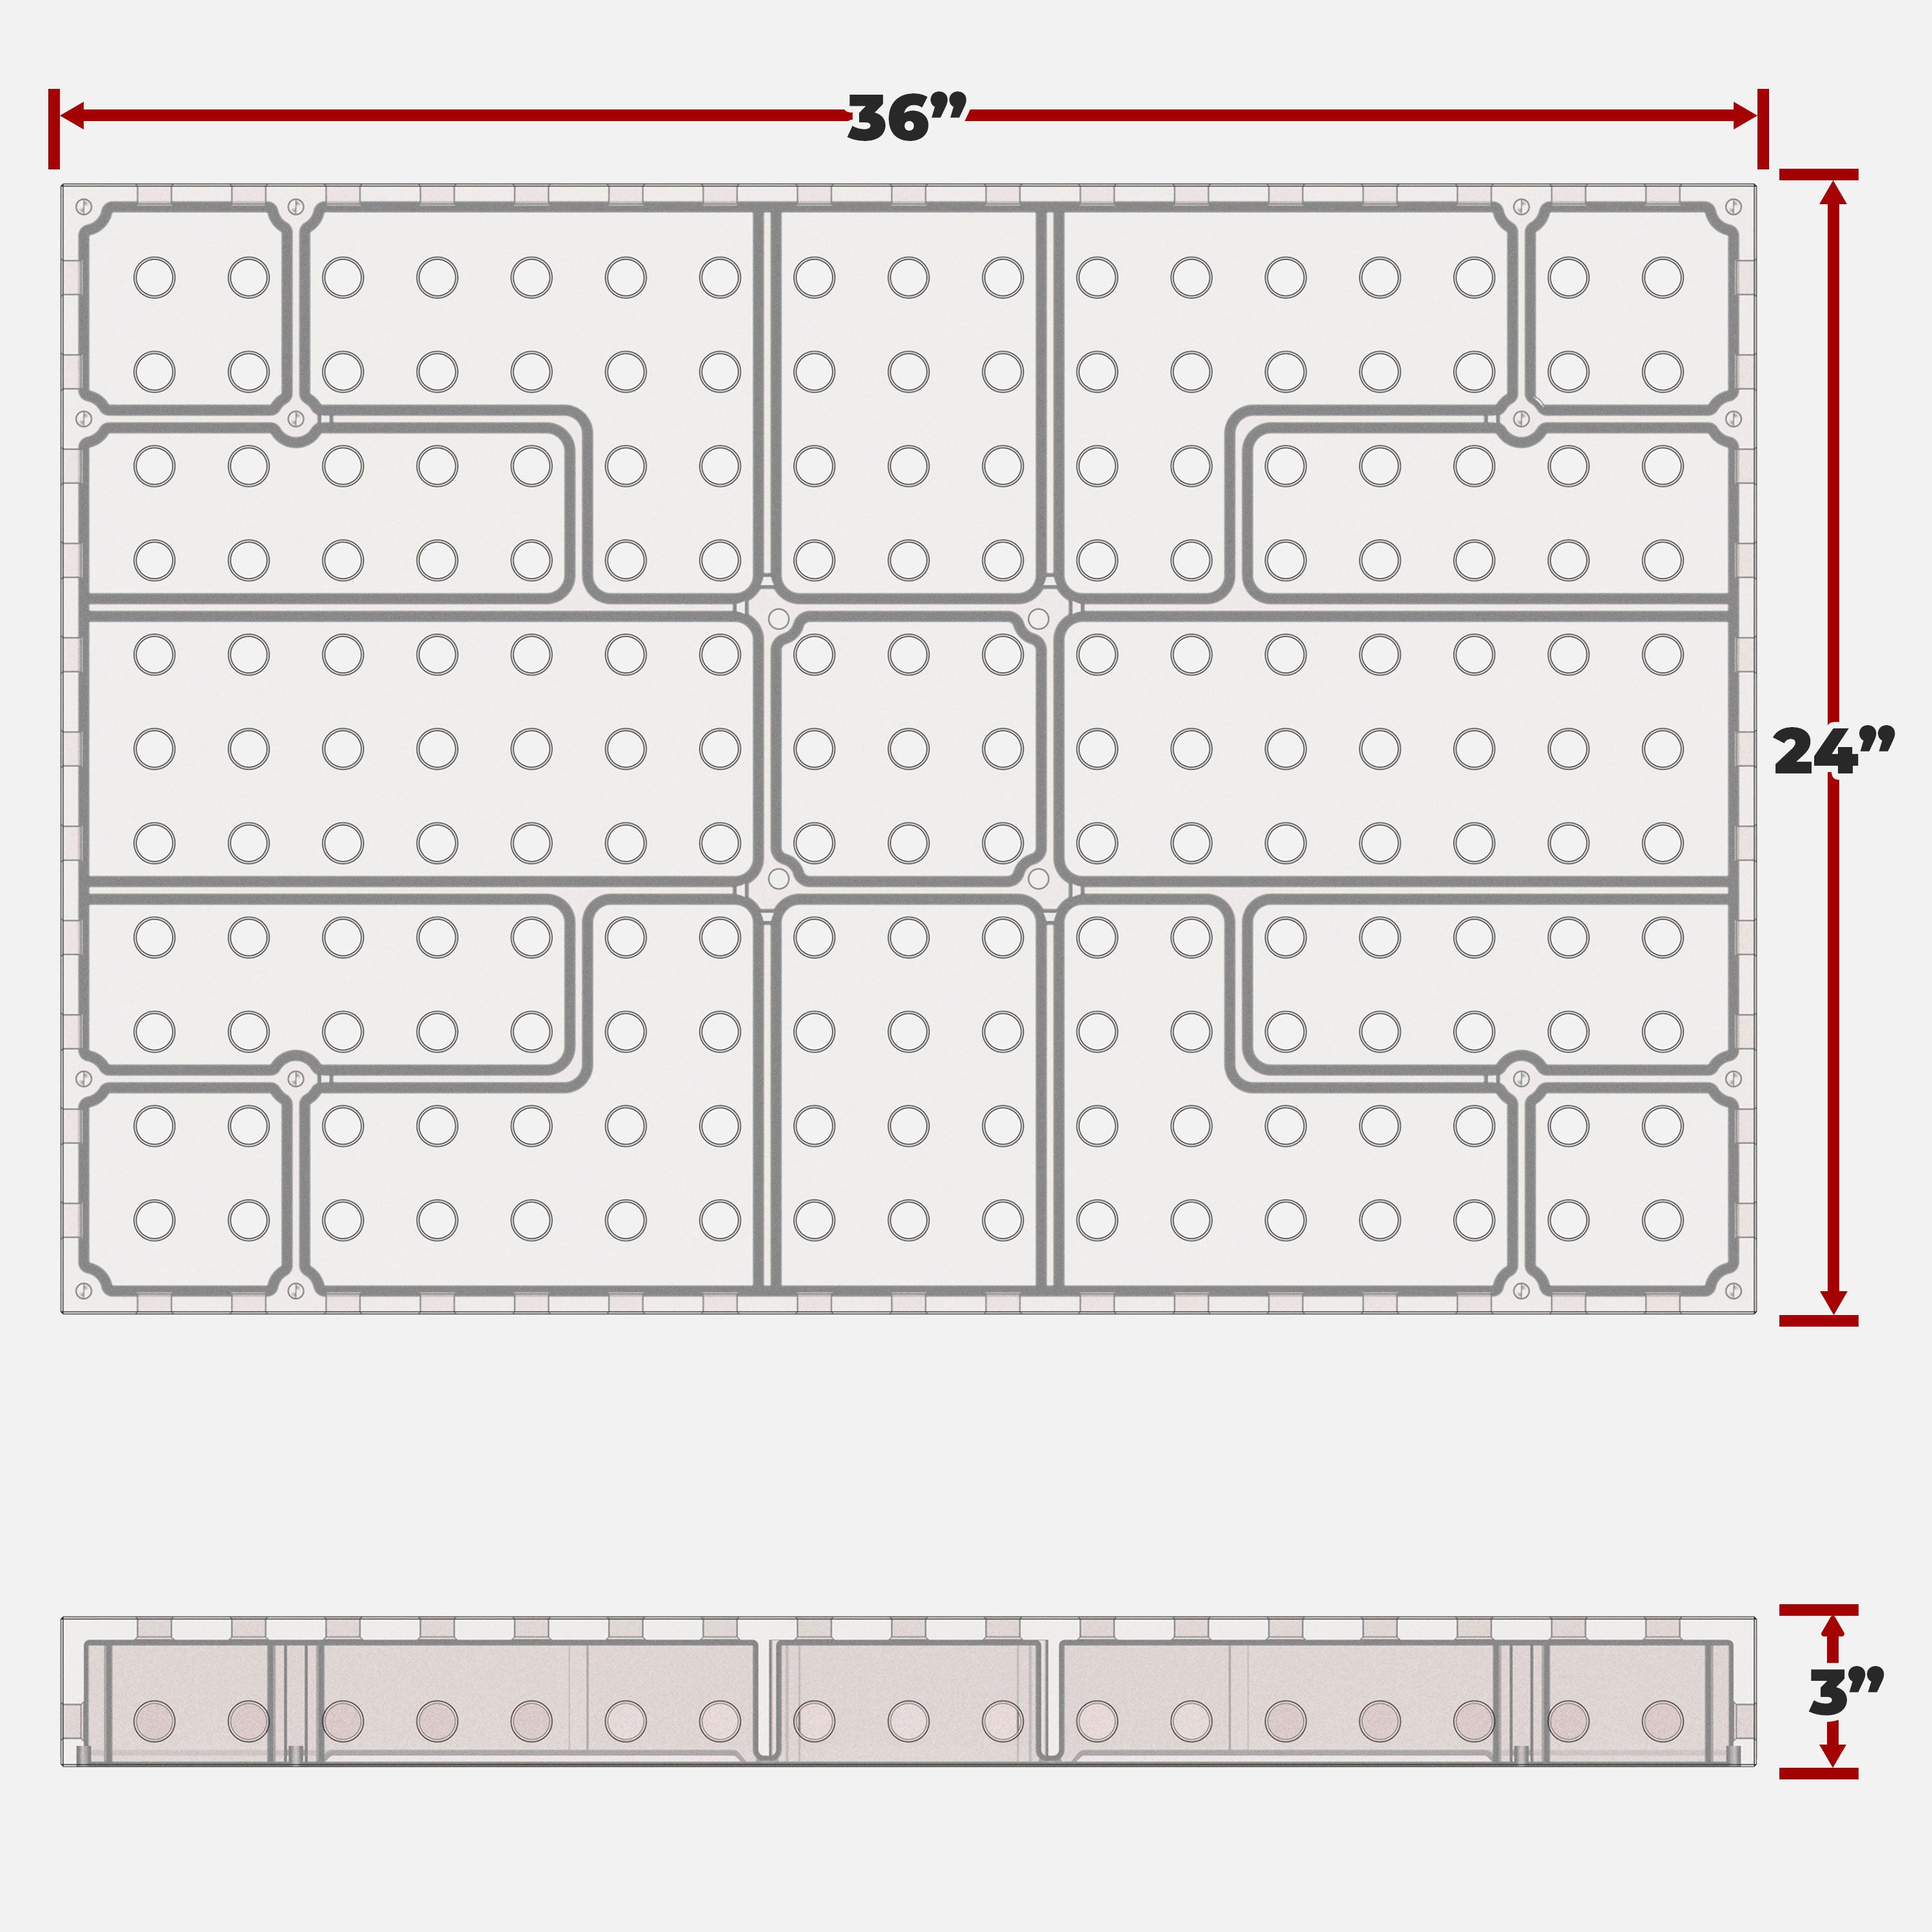
Blemished 36" x 24" Tabletop
Blemishes Include:
- A black oxide coating instead of Dragon Scale.
- Old Prototype: 3" Side Wall. Side holes are closer to the edge. 1- 1/2 Off center
- Minor imperfections on surfaces
- Ribbing- Full height 4" ribbing engineered to torsional rigidity
- Holes- All counterbore and chamfered on back sides
- Side face on the tables are 3" tall with 1 row of holes.
- The modular leg accessory system provides an extensive range of customization options.
- 1/2" thick table that shares all the same fixtures as the 1" thick table.
How does the FA75 system compare to other Table Systems?
FA75 - Ø3/4"x2"
- 2" Grid
- 3/4" Hole Diameter.
- 1/2" Thick
FA625 - Ø5/8" x 2"
- 2" Grid Pattern
- 5/8" Diameter Hole
FA16 - Ø16mm x 2"
- 2" Grid Pattern
- 16mm Diameter Hole
FA28 - Ø28mm x 4"
- 4" Grid Pattern
- 28mm Diameter Pattern
Fixturing System
FA75 - Ø3/4" x 2"
The Fireball Tool fixture system is superior to others on the market. It features blocks that can be used in many different ways to maximize their usage. It also can be incrementally adjusted to ensure maximum coverage as efficiently as possible while others fail to reach certain distances without a complicated fixture.
FA625 - Ø5/8" x 2"
FA16 - Ø16mm x 2"
FA28 - Ø28mm x 4"
How to Install Legs on a Dragon Wagon
This is how to install legs on a Dragon Wagon. Remember, it is heavy so try to get a friend to help you.
Step 1: Stand the table up on its side (You can use a clamp in one of the side holes in order to get a grip, there is a GIF at the bottom that demonstrates this)
Step 2: Brace the table so it does not tip over.
Step 3: Put the legs on horizontally, starting from the bottom legs (make sure the holes line up on each leg across from one another). Torque the bolts to 30 ft. lbs.
Step 4: Stand the table up now that all legs are on. Remember, the table weighs upwards of 200 lbs - 400 lbs depending on the size, so be very careful (this is where your friend can help)